To Layout Hole Locations, Slots and Radii
Subsequent are the steps included in laying out the hole slots, locations, and radii:
(a) Study Figure and select proper stock.
(b) Cut off the stock, permitting enough material to square the ends if required.
(c) Take away all burrs.
(d) Clean the surface carefully, and apply lay out dies.
(e) Place an appropriate angle plate on a surface plate.
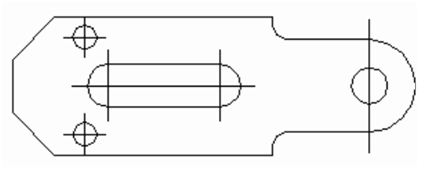
Figure: Layout
(f) Clamp the work to the angle plate along with a finished edge of the part against the surface plate. This is termed as the reference surface. Leave one end of the angle plate protruding beyond the work-piece. (All measurement for any location has to be taken from the base line or finished edge).
(g) Scribe the centerline as displayed in diagram for full length of the work-piece with the surface gauge set to the proper height.
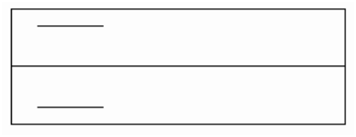
Figure: Lines Scribed Parallel to the Base
(h) Set the surface gauge as needed and scribe the centerlines for all hole and radii locations using centerline as a reference. The scribing of centerline for holes is displayed in figure.
(i) Turn the angle plate by 90° and scribe, base line at the bottom of the work-piece as displayed in Figure.
(j) Locate and scribe other centerlines for each hole or arc by using baseline as a reference line. Location and scribing of another centerline is displayed in diagram.

Figure: Lines Scribed Parallel to the Base
(k) Find the starting point for the angular layout.
(l) Eliminate the work-piece from the angle plate.
(m) Mark the center of all holes through prick punch with care.
(n) Scribe all circles and arcs by using divider set as displayed in diagram.

Figure: Circles and Arcs Scribed
(o) Scribe any line needed to connect arcs or circles as shown in diagram.
(p) Draw the angular lines as displayed in figure.
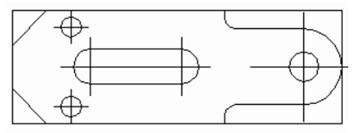
Figure: Arcs and Circles Connected by Straight Line