Laying Out Hole Locations Using Test and Proof Circles
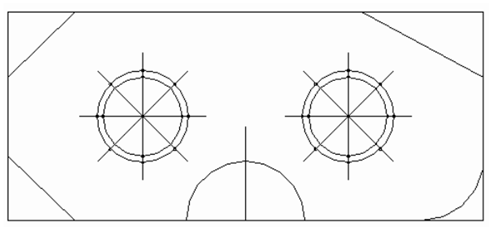
While the hole location is needed to be accurate, the position of the hole must first be laid out and after that test and proof circles should be scribed to point out the exact position of the hole. Test circles are scribed on the work-piece to depict the operator about the relation of the drill point to the location of the hole. This allows the drill point location to be moved over, if essential, before drill cuts to the full diameter.

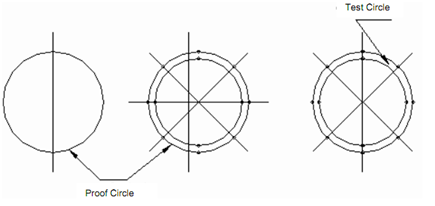
Figure: Layout Showing Test and Proof Circle
(1) On the edge Place the work-piece against the angle plate.
(2) Scribe a center of diameter 4 cm (centimeter) from one side of the work-piece with the surface gauge.
(3) Rotate the work-piece by 90° and scribe other line intersecting the first.
(4) Set the surface gauge to 8 cm (centimeter) and scribe another line intersecting the first.
(5) Mark the intersection of these lines by the prick punch.
(6) Set the divider to 2 cm (centimeter) and scribe two circles of the diameter 4 cm (centimeter). These are proof circles and indicate the location of the hole. Figures show the layout showing test and proof circles.

Figure: Steps in Layout Out Test and Proof Circle
(1) Set the divider to 1 cm and by using similar center points; scribe the circle in each of the other circles. These are the test circles and will point out whether the drill point is central with the proof before it reaches the full diameter.
(2) Place four (4) light punch marks on both sets of circles at the intersection of the lines if the circles are of diameter under 2 cm (centimeter). If the diameters of circles are over 2 cm, eight equally spaced punch marks should be made. The punch in proof circle will point out whether the hole has been drilled in the proper location.