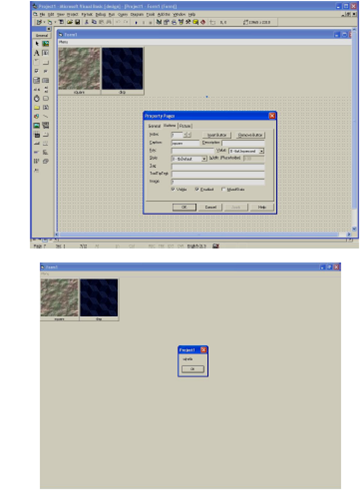
Associating Images to Toolbars:
1. Add an Image list to your form from the tool box.
2. Pick the custom property of the image list.
3. Click the images tab.
4. Select the Insert Picture.
5. Select an image & say ok.
6. Relate images with all the buttons.
7. Choose the tool bar object.
8. Choose the customs property.
9. Select the common tab page.
10. Put the image list with what you have formed. It would be the ImageList1 if you didn't change the name.
11. Select the buttons tab page.
12. Put the index property to 2 and set the image property to 1.
13. Later you associate the tool bar with the images click ok.
14. Later you require adding up the handlers for the tool bar.
15. Double click on the tool bar.
16. The handler shown below will be introduced.
Private Sub Toolbar1_ButtonClick(ByVal Button As ComctlLib.Button)
Select Case Button.Key
Case Is = "square"
MsgBox "sqhello"
Case Is = "disp"
MsgBox "disphello"
End Select
End Sub

Figure :Toolbars
Whenever you run the project you can click the tool bar as shown in the figure or the menu item or title to get the result. When using the menu editor if all the items are on similar indentation they will be the menu titles. To generate the menu items you displace them with the arrow keys.