Reference no: EM132379465
Game Development Fundamentals - Assignment: Game Prototype
Overview
For this assessment task you are expected to construct a prototype level/area as a "proof of concept" for the game that you have designed in Assignment Part B. The prototype should function with proper game logic utilizing self- created and pre-made artistic and programming assets.
Learning Outcomes Assessed
The following course learning outcomes are assessed by completing this assessment:
• K5. Identify the appropriate and correct syntax and programming constructs for different game development requirements.
• S1. Select and apply appropriate games development approaches to solve a real world game design;
• S2. Create a range of assets for a game's project;
• S4. Use programming constructs to respond to user input and to create object and character behaviours;
• S5. Analyse, design and implement game concepts using structured and basic object orientated programming concepts;
• S6. Test and debug code to correctly meet game design requirements.
• A1. Operate appropriate software packages to design and build games and interactive media products that align with client and project expectations;
• A2. Utilise appropriate software environments to develop and integrate code implementations with game assets.
Semester Assessment Overview
You will go through the game development life cycle outlined in Lecture 2 during this semester to pitch an idea for a new game, design that game, and then develop a small prototype of that game for Windows PC.
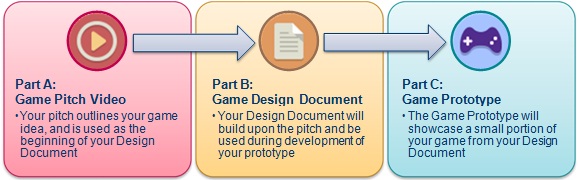
The Game Prototype is related to your designs outlined in your Game Design Document.
Assessment Details
After your game pitch, you will have reiterated and written a game design document for Assignment Part B that discusses your game idea in detail, including most or all of the following: genre, story, setting, characters, objects and game mechanics. Using your game design document, you must now develop a small functional "proof of concept" prototype that showcases part of a level or contained area of your game.
What does "proof of concept" mean?
• A Proof of Concept prototype is simply an abbreviated version of your game, developed to show off particular features of your choosing (that should be appealing). Your Proof of Concept prototype does not have to be a full-length level or game, it can be as simple as a few aspects of game play.
• Here are some just some examples of different proof of concept prototypes:
o RPG: an option would be to showcase a small village with a few characters you can talk to, with a couple of game mechanics - rather than showcasing an intricate RPG combat system.
o Shooter or Racing: the markers will probably expect that your prototype will have at least some shooting or racing respectively!
o Platformer: at minimum some platforms and jumping should be involved in your prototype, and possibly an enemy or two to dodge or attack.
• Remember: the core mechanics and scripted events of your game will really show proof of your game concept in the prototype assignment.
Beginning the assessment:
To ensure consistency and standards, all students should begin the prototype in the following manner:
• Open Unity and create a New Project.
• Name the project as your student number followed by the name of your game
o (example: 30126565-ThunderRun).
• Choose a location to save your Project.
o Take note of the location as upon completion of your assignment you need to zip this entire project folder for submission.
• Set the template to 3D (unless you are creating an approved 2D game).
• Turn off Unity Analytics, then Create the Project.
In the Project Tab (depending on Unity preferences, your project tab will look like one of the screenshots to the right):
• Rename the SampleScene to an appropriate name for your first scene in your game.
• Create some child folders under Assets.
o Downloaded Assets - To store any external assets downloaded from the internet / Unity asset store.
o My Assets - To store art assets you create yourself for your game. Materials, Sprites, Interface art, 3D Models, Prefabs, Terrain, etc.
o Scripts - to store any C# scripts that your game uses.
o Scenes - This folder should exist by default and you should place your game scene(s) in here.
o You can create additional child folders to categorise and store particular assets.
o Packages - created by default. You can ignore it.
Requirements:
There are a number of requirements that you must adhere to when completing this assessment task:
• Assets - self-creation
o It is expected that you can develop your own 2D and 3D art assets that are appropriate for your game dimension (2D or 3D). Remember that creating a 3D game is highly recommended.
» 2D games must have at least four 2D assets (not just primitive shapes) created by yourself. Static sprites, world terrain and interface art are the most likely choices here.
» 3D games should have at least four assets (not just primitive shapes) created by yourself in 2D (materials and/or interface art), 3D (meshes), and/or even a world terrain (3D level mesh or Unity terrain).
» All art assets you create should be placed in your "My Assets" project folder in Unity.
» All art assets you create need to be listed in your report (see next page).
o GIMP can be used to develop 2D assets (see Lab 1 for GIMP instructions).
» You can use alternatives like Photoshop for your assignment but there will be no labs exploring this alternative.
o Blender can be used to develop 3D assets (see Labs 2 and 3 for Blender instructions).
» You can use alternatives like 3ds Max or Maya for your assignment but there will be no labs exploring these alternatives.
o Unity can be used to develop a Terrain (see Lab 6 for Unity 3D Terrain). Primitive objects can be placed in Unity, but will receive a low score, unless arranged into an elaborate scene.
• Assets - sourced online
o Unity has a huge library of over 5000 free premade assets you can import and use, and not limited to just art assets (see Labs 4 to 10 regarding Unity and Moodle Resources links to free assets).
o It is acceptable to source additional external assets if needed, but they should be completely free to use (under Creative Commons 0 licensing), and MUST be linked to in your brief report.
o External premade assets source online should be placed in your "Downloaded Assets" project folder in Unity. This includes Unity's own "Standard Assets".
o External premade assets source online should be used appropriately within your prototype.
• Game Prototype Development
o Single player requirement. Multi-player will make the scope much larger - too much for this introductory course (unless your multiplayer design has been approved by the lecturer).
o Unity is a requirement for developing your game prototype, do not use any other game engine software (see Labs 4 to 10 regarding developing simple games and triggered events in Unity as well as Moodle links to Unity tutorials to build small playable games for multiple genres).
o When you first start a new project in Unity for this assignment, name the project your student number followed by the name of your game (example: 30126565-ThunderRun)
o Your Unity Game Prototype will include:
» Scene(s) & Objects - Engaging use of Objects (your own four created assets, plus additional sourced free assets) including 3D objects (or 2D sprites and backgrounds) such as the player, props, cameras and light sources to create your scene. These objects will have components and scripts attached to create the mechanics of your game.
• Prefabs - Use of prefabs to create additional instances of Objects.
» Materials (3D only) - placed on game Objects to distinguish them apart from one another.
» Layers (2D only) - if you decide to build a 2D game, layers should be used appropriately to distinguish foreground, middle ground and background elements.
» Components - Components added to your game Objects where appropriate such as an Animator, Rigidbody, Collider, Particle System, Audio, etc. Transform is a required component and is not considered for marking purposes.
» Scripts - Written in C#. At a minimum scripts must be used to give user control over the player character/object, and create one event. Ideally, you will use Scripts to trigger multiple events, collision detection and control the interface elements below.
» UI (User Interface) Elements - At least one Unity UI element such as UI Text and Buttons, which should be scripted to control their functionality. Examples: scoring system, ammunition left, chat dialogue or another interface element.
• Brief Report
o You should also submit a report detailing what you have done. A template is provided on Moodle
to make this easier for both you and your marker. This must briefly address:
» Which of the assignment criteria have been implemented. Do not rely on the marker noticing which criteria you have met, so highlight where you have implemented each element.
» Any major aspects of the game which have changed since your game design document, explaining why this has occurred.
» Any limitations or known bugs in the game. Unacknowledged bugs detected during marking will be taken as evidence of insufficient testing. Bugs that have been documented in this report will receive more leniency in marking than those that are unacknowledged.
» An overview of all of the scripts which have been created and which game object(s) each one is attached to.
» A list of art assets that you developed yourself, and any premade assets (such as Unity's standard asset packages and free assets from the Unity store) or external assets (found online) used in the project and their source.
Submission
When you first started a new project in Unity for this assignment, you should have named the project as your student number followed by the name of your game (example: 30126565-ThunderRun).
• Locate this Unity project folder.
• If you are not sure where you placed it:
o Open your project in Unity.
o Right-click on Assets from the Project tab.
o Click "Show in Explorer".
o Your Project folder contents will display.
• Zip the entire contents of the Unity game prototype project folder, and submit this single ZIP file and your Brief Report.
Attachment:- Game Prototype.rar